
Photo by Gabriel Heinzer on Unsplash
How to upload image to Server using Multer in NodeJS?
Tutorial for handling images & uploading it.
It’s most common required feature & yet it seems difficult to most beginners.
In this article we’re going to create REST API, which will take image as an input sends it to server.
Pre-Requisites
- Node & Npm installed.
- Basic Knowledge of Node JS & environment setup.
- Postman for API testing.
Steps
- Setting up new express project
- Installing Dependencies
- Multer config
- Create Endpoint
- Testing API
Setting up new express project
Use express-generator for quick skeleton code.
npx express-generator upload_image
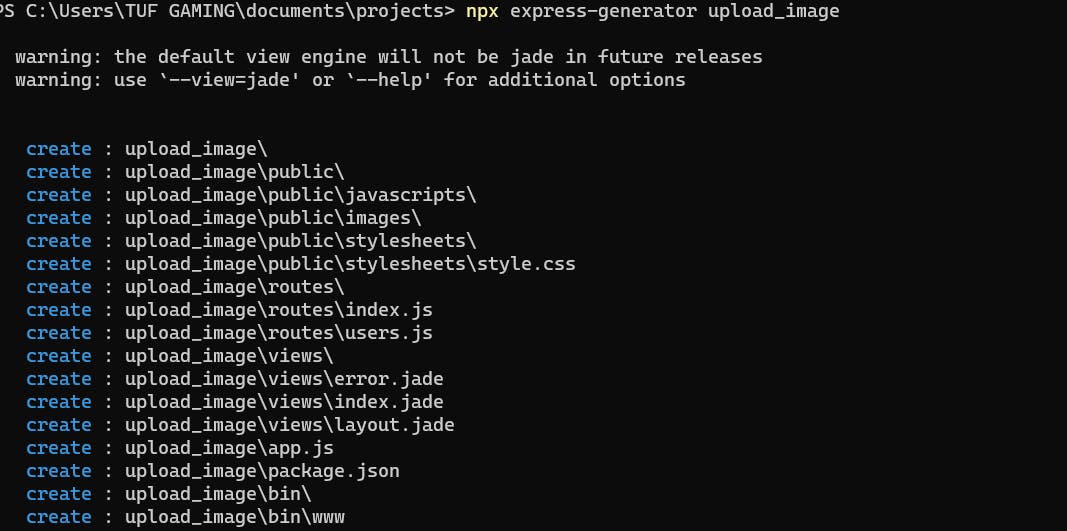
Run these commands
cd upload_image

npm i

npm start
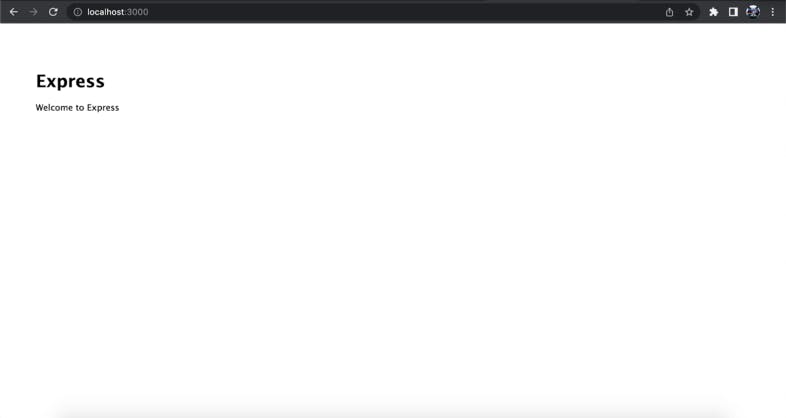
Installing Dependencies
run this command
npm i multer nodemon
Multer => Multer is a node.js middleware for handling multipart/form-data, which is primarily used for uploading files
nodemon => it is a tool that helps develop Node.js based applications by automatically restarting the node application when file changes in the directory are detected.
Add nodemon into package.json file
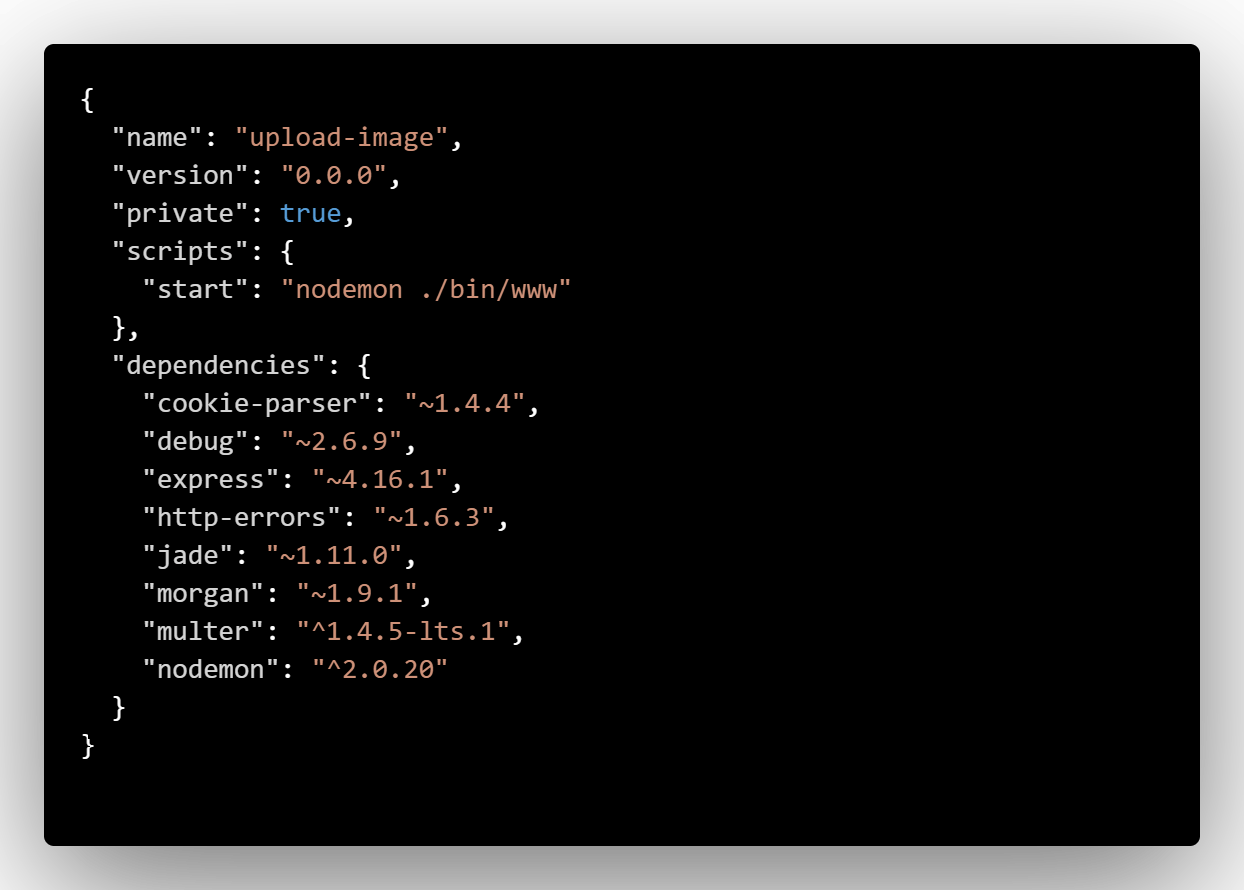
Add Multer
Create a file multerConfig.js inside config folder
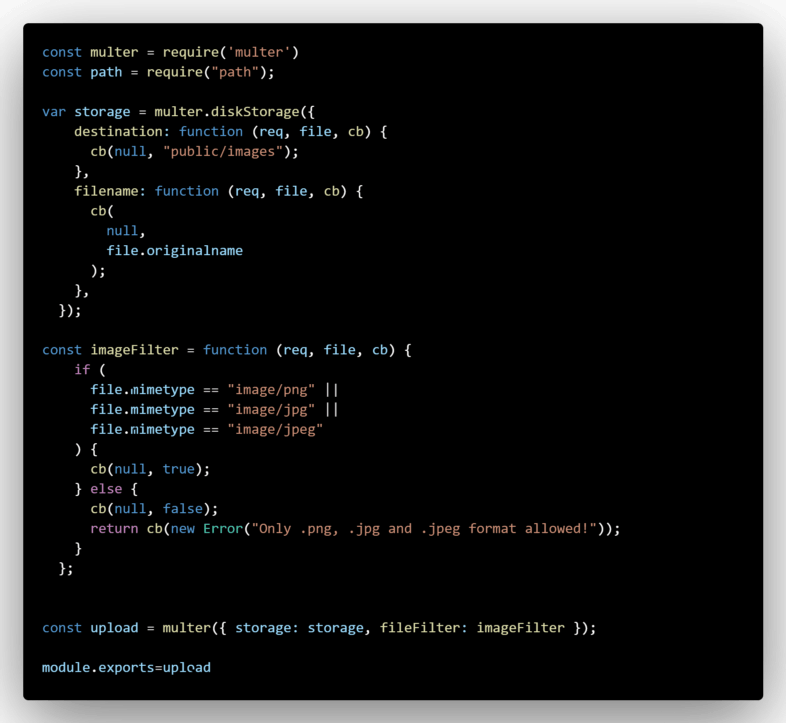
Here we’re validating image types, this will check if it matches correct type then it’ll upload image to local folder public/images otherwise it’ll throw an error.
Create Endpoint
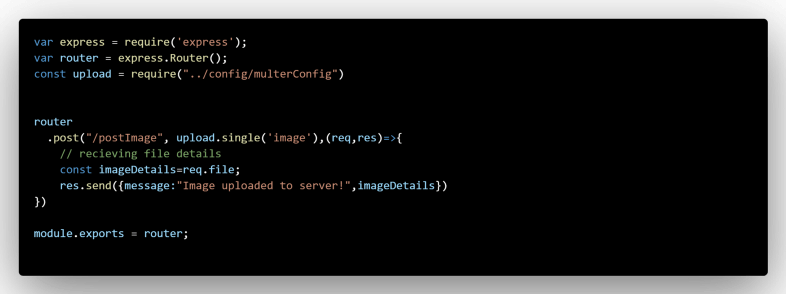
let’s Create an Endpoint to receive image
Add this in routes/index.js
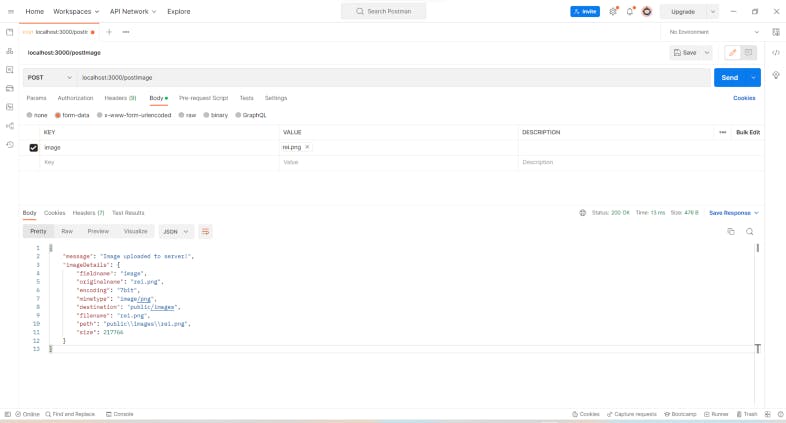
Testing Request POST localhost:3000/postImage
Conclusion
We’ve completed an endpoint which receives image in form data & stores in public/images folder.
Here’s complete code AtiaK/upload_image (github.com)
We'll be uploading images to Cloudinary in next article.
Hope this tutorial helped you!! if you need any help, you can let me know in comment section.
Thanks for reading! if you want me to cover a topic, feel free to let me know in comments below. 👇💬
☕️ You may support me by buying me a chocolate: buy me chocolate
Cheers, See you in next one. 🎉🔔
